Data Binding Nested DataList Controls
Whilst this example will show only one DataList within another, the example can
be easily extended to any number of nested DataLists. Here are our 2 nested data
list controls:
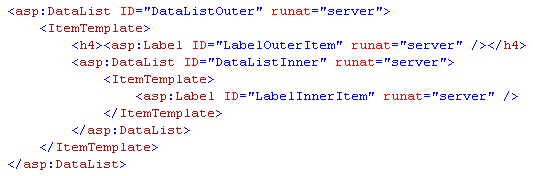
The above code shows that we have one label control in the outer datalist and one
label control in the inner datalist which we will use to display our data. Our data
source will be a simple string array:
string[] outerDataSource ={ "Outer Item 1", "Outer Item 2", "Outer Item 3" };
string[] innerDataSource ={ "Inner Item 1", "Inner Item 2", "Inner Item 3" };
This will produce the following output:
Outer Item 1
|
Inner Item 1
|
|
Inner Item 2
|
|
Inner Item 3
|
|
Outer Item 2
|
Inner Item 1
|
|
Inner Item 2
|
|
Inner Item 3
|
|
Outer Item 3
|
Inner Item 1
|
|
Inner Item 2
|
|
Inner Item 3
|
|
The real work ofcourse is being done in our
code-behind file:
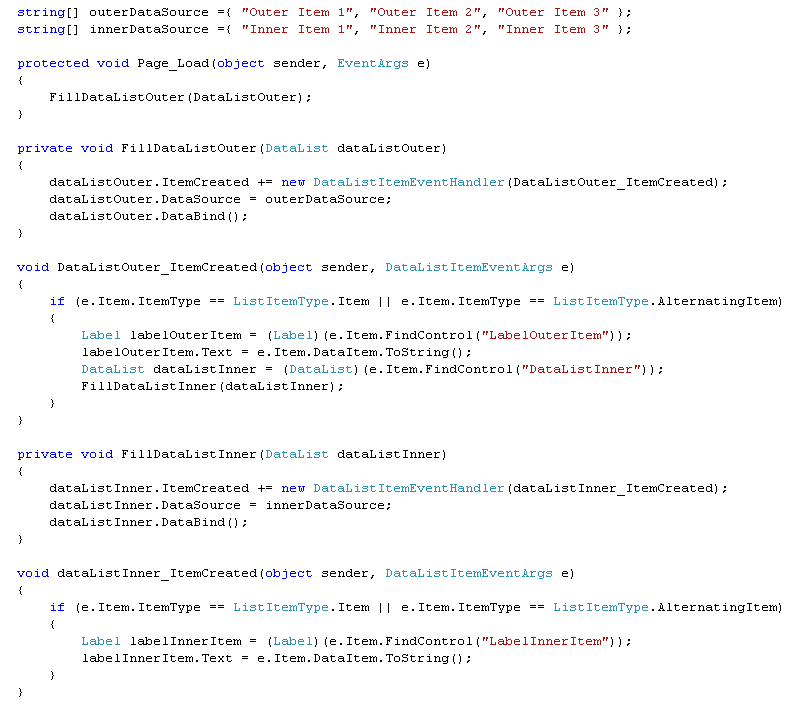
First we fill our outer data list control (see method FillDataListOuter). Before
we bind our outer data list we need to hook up the ItemCreated event handler as
this is fired whenever a new item is created. We could have done this within Visual
Studios designer view but i think this looks neater and consistent with the other
method (FillDataListInner).
Within both the ItemCreated event handlers we first check that the ItemType is either
an Item or an AlternatingItem since our controls are within the ItemTemplate.
(Although i haven't tried this, i dont suppose there would be any problem having
a DataList nested within the <HeaderTemplate> of a DataList. The e.Item.ItemType
we would then test for would be ListItemType.Header)
Anyhow, within the ItemCreated event handler of the outer data list we can now find
our 2 controls one of which is the nested DataListInner and the other is the LabelOuterItem.
Similarly as before we fill our inner data list control (see method FillDataListInner).
Before we bind out innner data list we need to hook up the ItemCreated event handler.
Within this event handler we can access the label control (LabelInnerItem) of the
inner data list.